Concepts Tab
From PatioWiki
(Proofreading) |
m |
||
| Line 72: | Line 72: | ||
[[Category:Edito]] | [[Category:Edito]] | ||
| + | [[es: Pestaña_Conceptos]] | ||
Current revision as of 08:30, 26 September 2011
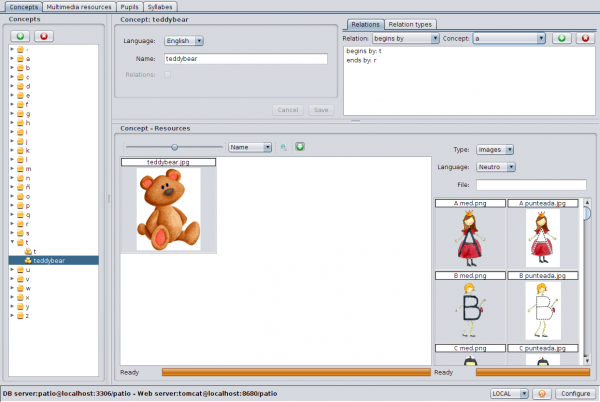
In the Concepts Tab, part of the Edito application, you can create, modify or delete concepts. Besides, concepts can be related to each other or even create a new type of relation. Finally, in this tab you will be able to easily assign multimedia resources to a new concept.
Note that concepts must have a description in the same language as the user interface in order to be well shown in the concept tree.
Contents |
Concepts Panel
In this panel, you can add, modify or delete concepts. According to the operation in course, field colour will change to green if the user is adding a new concept or it will change to yellow if it is in editing mode.
Add a new concept
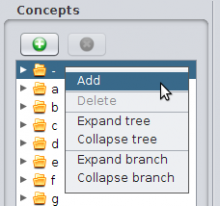
Concepts can be added using the + button at the top of the concept tree or choosing Add from the popup menu shown when the tree is right clicked with the mouse. When the panel is in editing mode (field boxes in green), you must write a name for the concept in at least one of the available languages. If you check the checkbox Relations, the default relations "begins with", "contains" and "ends with" will be created when the concept is saved. You have to press the Save button to confirm the concept addition while to abort changes, Cancel button has to be pressed instead.
Modify a concept
To modify an existing concept, you have to select it from the concept tree so that the modifications can be done inside the editing panel. Note that the panel automatically changes to editing mode (yellow colour) when you modify something. In the same way as when you add new concepts, you have to confirm the changes by pressing the Save button or cancel them using the Cancel button.
Delete a concept
In order to delete an existing concept, you have to select it from the concept tree and press the X button at the top of the tree or to choose Delete from the popup menu shown when the tree is right clicked with the mouse. Finally, you have to confirm the deletion in the security dialogue which will appear on the screen. Note that this operation implies deleting also the concept relations of the concept and the multimedia resources assigned to it.
Concept - Resources Panel
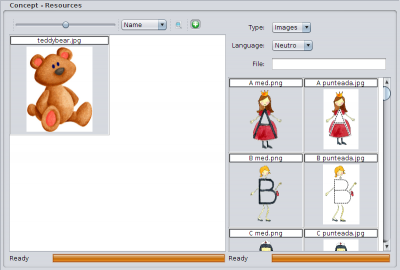
In the lower panel, titled Concept - Resources, you can view the multimedia resources assigned to the selected concept. To assign a new multimedia resource from the database to the selected concept, you have to first select it from the side panel which appears when you press the + button placed in the lower panel. Next, when you have selected the multimedia resource, you have to drag and drop it into the lower panel. Note that the side panel has several filters in order to help you find the desired multimedia resource.
To delete a multimedia resource assignation from a concept, you have to select it from the Concept - Resources panel, press the Del key on the keyboard and finally confirm the security question that will appear on the screen.
Relations between concepts
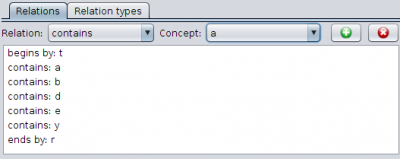
In order to improve the features of the project, concepts can be related to each other. Relations between concepts are managed from the top right panel. There, you can relate concepts in the Relations tab or create new relation types, modify or delete the existing ones in the Relation types tab.
Relations Tab
In this tab, relations between concepts are managed.
Add a new relation between concepts
To make a relation between concepts, you have to select the source concept from the concept tree. Then you have to choose the relation type and the target concept in the Relations panel. Finally, you have to press the + button in this panel to add a new relation. Now, the concept panel is in editing mode (yellow colour), therefore you could add more relations or even make other changes to the concept before pressing the Save button in order to confirm all these changes, including the new relations. Of course, you can press the Cancel button to discard the changes at any time.
There is a more intuitive method of establishing the "is-a" relation. It consists in dragging inside the concept tree the source concept and dropping it over the target one; this will add a new relation between these concepts. Note that the "is-a" relation is shown in the concept tree as a hierarchy of elements.
Delete a concept relation
To delete a concept relation, you have to select it from the concept tree, then you have to select in the Relations panel the relation to be deleted and finally, you have to press the X button of this panel. In the same way as in the previous case, the concept goes to editing mode, so to end the deletion process, you have to press on the Save button to confirm the changes, or on the Cancel button to discard them.
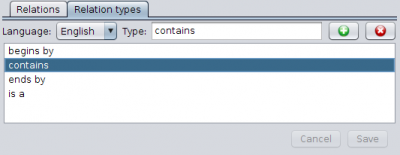
Relation Types Tab
In this tab, relation types are managed.
Add a new relation type
To add a new relation type you have to select the Relation Types tab and then press the + button in order to introduce the relation name in the chosen language. To confirm this operation, you have to press on the Save button and to cancel, on the Cancel one.
Modify a relation type
To modify a relation type you have to select it in the Relation Types tab and make changes to its texts in the available languages. Again, by using the Save button you confirm changes and cancel them with the Cancel button.
Delete a relation type
To delete a relation type, first you have to select it from the Relation types tab and then you have to press the X button. Finally, you have to confirm the deletion in the dialogue shown for this purpose.
